tutorial

Black & Gold Festive Eyes

20131210-145407.jpg

20131210-145553.jpg
I tried out a new look using black (which I never usually use) and gold shadows to make a festive party look. I don’t look very party ready in the photo because I’ve done this look purely for blog purposes. You can go for Christmassy red lips to complete it like in the first photo, or just keep it safe with a more nude, both look acceptable.

Firstly, I primed my lids with MAC Painterly paint pot. I’m absolutely awful at blending powder shadow neatly into my crease so I used a black eyeliner and applied it messily in the outer V of my lids. I then used a MAC 217 brush and blended that out. Next I took Half Baked eyeshadow from the Urban Decay Naked 1 palette and packed it onto my lid, it’s the perfect gold shimmery shade. As you can see, I got fall out all in my lashes so make sure you clean that out if that happens. I took half baked under my eyes as well and then lined my waterline with MAC Coffee eyeliner. Finally I added Collection liquid liner in a winged look on my lids, applied some Rimmel Bold curves mascara and we’re done.

Hope you all have a lovely evening x

Modern Pin-Up Inspired Look

20130824-161202.jpg
I decided to do something different to my make-up today and ended up being inspired by the various pin-up style looks on Pinterest. This kind of look is probably the easiest look there is and focuses on the whinged eyeliner and bold lips. Instead of the classic pillar box red, I used a darker colour and MAC Chili was the lipstick of choice.

20130824-161307.jpg

20130824-162434.jpg
I wanted to keep my face looking more matte than usual and applied Estée Lauder double wear foundation with a Real Techniques Stippling brush, I then applied Bobbi Brown eye brightener under my eyes and blended with my fingers. For Bronzer I used Bourjois Bronzing Primer, also applied with the same Real Techniques brush and then dusted Rimmel Stay Matte powder all over. For blusher I used Illamasqua Hussy.
For my eyes I only used the Urban Decay Naked Basics palette because it contains brilliant matte shades. I applied Foxy to my lids for a base and then Naked as a transition colour in and above my crease. I applied Faint into my crease and flicked it out to lift the eye up. I then used Collection 2000 liquid liner to create a dramatic whinged out line, followed by YSL Shocking mascara. I used a crease brush to add some of the Naked shade under my eyes and then used Benefit Bright Eyes on my water line instead of a dark colour – this just makes the eye appear a little bigger.
Finally, I used MAC Cherry lip liner to line my lips before using MAC Chili lipstick, to add some detail I lightly dabbed some foundation to the middle of my lips.
I apologise for the bad quality photos, I had to use my iPad on this occasion.
Hope you’ve all had a relaxing Saturday!
Bloglovin’

Navy Smokey Eyes With Champagne Shimmer

20130815-171939.jpg
I’m at it again, rumbling around my make-up and playing with new eyeshadow styles to try and knock myself out of my boring neutral eye comfort zone. I like having subtle shades of browns as my eye make-up but when I see all the beautiful looks you can achieve if you force yourself to be a little braver; it makes me want to do it, especially seeing as I have plenty of colours to experiment with. I’ve chosen a navy smokey eye look using my Bobbi Brown Navy & Nude palette, it has the most perfect matte navy colour which blends like a dream which makes everything a lot easier.

20130815-173107.jpg
For my face I just used Laura Mercier Oil-Free foundation primer then applied Estée Lauder Double Wear with a Real Techniques Stippling Brush. Using the same brush I applied Bourjois Bronzing Primer and then dabbed Bobbi Brown Eye Britghtener under my eyes with my fingers. For blush I used Dior Rosy Glow and MAC Soft & Gentle for a highlight.

20130815-173344.jpg
I primed my eyelids with Urban Decay Primer Potion and then added the navy shade from the Bobbi Brown palette just in my crease with a Crown Brushes crease brush, if you use a crease brush the line might be a bit defined so you’ll need to blend this out nicely. I then dragged the colour down to my lid so it makes a V shape on the outer corners as shown in the photo, I then continued to drag the colour underneath the eye but only half way across; the shimmer colour will cover the inner half. I then used the shimmery golden colour from the palette and applied this to the inner corner, half way along under my eye to connect with the navy colour and then also on the rest of the lid where the navy isn’t applied. Collection 2000 liquid liner came next , you can do that however you prefer then use a mascara of your choice; I chose YSL Shocking mascara for a more dramatic look. Finally I applied Revlon lipgloss in ‘Pink Snow’.

20130815-174125.jpg
Hopefully that made some kind of sense, happy Thursday guys, it’s Friday tomorrow. Yaaaay!

Rosie Huntington-Whitely Inspired Make-up

20130807-142358.jpg
Not so long ago I did a similar post on Kim Kardashian’s make-up which you can view here. That was a lot more on the dramatic side so I felt like doing another but on a much softer look. I’m obsessed with the Victoria Secret ladies, particular Rosie and Candice and their make-up is always gorgeous and elegant. Once again, I don’t look anything like her but you can get inspiration from anyone and I used her classic red carpet look which is so so simple and basically consists of just whinged liner and bolder lips.

For my face I used Bourjois Healthy Mix foundation and applied it with a Real Techniques stippling brush. I then used a tiny amount of Bourjois Bronzing Primer with the same brush and then added Bobbi Brown Under Eye Brightener under my eyes and blended with my fingers. For my cheeks I used MAC blusher in Pinch me which is a bronzey, reddish pink which I think was the closest I owned to hers. I highlighted my cheeks and nose with MAC Soft & Gentle.

20130807-143052.jpg
For my eyes I used only the original Urban Decay Naked Palette like always and used an Avon eyeshadow brush to lightly tap Sin onto my lids, I then used a Crown Brushes crease brush to blend Naked into my crease, I then pulled naked higher up from the eye because Rosie seems to like that cat eye shape. I then applied Naked under my eyes and Venus as an under eyebrow highlight and an inner corner highlight. I then used Collection 2000 liquid liner to create the flick and YSL Shocking mascara for my lashes. Sorry about the rubbish quality final photo, I forgot to take one and had to use my phone.

Please note, my lips are obviously overdrawn to the max with pencil liner haha, my lips are like little baby slugs compared to Rosie’s beautiful full lips so I had to get creative with the lip pencil. I used MAC Cherry liner and I also used this for the lip colour because I find her lips to be very stained and ‘just bitten’ looking which pencils are good for. I’d mute the lips down for public wear unless you’re blessed with big lips.
Thanks for reading guys, it’s such an easy look to do. Hope you’re all having a lovely day, it’s already mid-week!
Xxx

Kim Kardashian Inspired Make-Up Look

20130730-150933.jpg

20130730-153349.jpg
There are so many Kim Kardashian make-up looks flying around the blogosphere and all over youtube. Her look is so flawless yet it’s one of those looks that is so easily achievable so I thought I’d give it a go. Obviously, I’m the most opposite to Kim Kardashian you could possibly get – she’s gorgeously bronzed with dark hair and features and I’m blonde and pale with light features so I’m not going to copy it identically (not that I could) but I used inspiration from her look.
For my face, I used Estée Lauder double wear foundation and then used Chanel Bronzing base all over my face to give me a bronzed glow. Bourjois have now brought out a very similar product which is a bronzing primer for a much cheaper price and I can’t wait to try it and compare! Next I used Collection 2000 concealer under my eyes and blended it in before using Benefit Hoola to contour my cheek bones and hair line. I applied MAC give me sun bronzer as a blusher and then used NARS Albatross to highlight my nose and cheekbones.

20130730-152947.jpg
The photo explains what I did to my eyes, Kim Kardashian likes her browns and golds so I kept that style and did a heavy under eye like hers.
Xxx

Dramatic Bronzed Evening Look

20130724-162452.jpg
I’m no make-up expert, in fact I’m pretty amateur and don’t really experiment with different make-up looks so I’ve been setting myself little challenges in order to push the make-up boat out a bit. I planned to do a bronze smokey eye look for a night out with a dramatic lip and here it is.

20130724-162750.jpg

20130724-162807.jpg
For my face I mixed my Chanel Illuminating Base primer in with Estée Lauder maximum coverage foundation. I didn’t add primer first or apply the foundation alone because it’s a heavy coverage foundation and I really dislike the texture of it on its own – when it’s mixed with some form of liquid illuminator it is the most gorgeous foundation. I discovered this from Gossmakeup’s youtube video and he’s so right, you get a lovely glowing complexion from it. I then applied Bobbi Brown under eye Brightener in a V shape under the eyes and Chanel Bronzing Base on the high points of my face for a contoured look, I didn’t use powder because I don’t want to mattify the look, I’d take powder out with me though. For blusher I used Bourjois Rose D’or. Simple.

For my eyes I used the Urban Decay Naked Palette as usual and chose the colours Sin, Buck and Smog as shown in order below

20130724-163717.jpg

20130724-165314.jpg

20130724-165319.jpg
I applied sin on my lids, buck in the crease and smog on the outer corners and under the eye quite generously. I then applied some individual lashes, mascara and eyeliner.
I then applied MAC Rebel lipstick to increase the drama, I doubt I’d be brave enough to go out with heavy eyes and then a bright purple lip but you never know.
Don’t forget to enter my giveaway down below. Hope you’re all having a lovely day xxx

LOTN : Purple Smoke

20130702-223309.jpg

20130702-223315.jpg

20130702-223330.jpg
For tonight’s make-up I decided to add a pop of colour seeing as I usually stick to browns and neutrals. I used the purple shade to the outside corners of my eyes and whinged them out- it’s one of the easiest looks ever and really stands out.

20130702-222552.jpg
For my base I used MAC paint pot in Let’s Skate and then used Faint from the Naked Palette in my crease. For the purple haze I used MAC fig on my outer corners which is a gorgeous deep purple shade – I then lined my lower lash line with the same Fig shade before finishing off with my liquid liner from Collection 2000, individual lashes and Benefit They’re Real mascara.

Here is the completed look when I got home, still in place and it shows more of the purple under the eye.

20130702-223012.jpg
Happy Tuesday guys ❤ xxx

My night out make-up tutorial in Instagram photos

I can’t actually believe I’m posting my mug without make-up on to the world – or less dramatically, the blogger world. Either way, I apologise for the sights you may see! I do this make-up look every time I go on a night out or for a meal, it’s similar to my day-time look as I’m not fussed on the majorly smoky eyes on myself, even in the night so I just add a bit more shadow and a bold lip. Oh, and please excuse my ridiculous ‘make-up hair’.

20130306-184430.jpg
Step one

20130306-184513.jpg
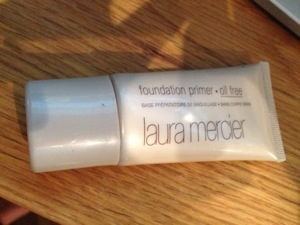
Apply a trusty primer, especially if you’re going to a club. This will help your make-up stay in place and not make you look like a sweaty melted slug when the lights turn on at closing time – or is this just me?

20130306-185100.jpg
Step two
Use your favourite foundation and favourite foundation brush, I love my Estée Lauder Double Wear and find it applies the nicest with a Real Techniques Stippling Brush. This brush just properly buffs it into the skin so it isn’t cakey or thick – highly recommend it if you’re going to use a heavier coverage foundation.

20130306-185138.jpg

20130306-185515.jpg
Step three
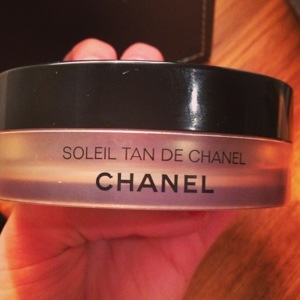
Use a bronzer to contour your cheekbones, I like to use Chanel’s bronzing base for this because it’s a creamier consistency which means it won’t take away any of the dewiness your foundation gives you but any bronzer will do. I use the same brush I used for my foundation, suck my cheeks in and just run it generously through the hollows of my cheeks, I then get a blusher brush and blend it in until there are no harsh lines. I then take the bronzer through my temples and down my nose.

20130306-185544.jpg
Step four
I use Collection 2000 concealer to cover any darkness under my eyes, any concealer will do but this one is cheap and amazing.

20130306-185657.jpg
Step five
I then take my Touché Éclat to highlight the areas I want highlighting – I’m not majorly fussed on this product and will be buying a cheaper version when it runs out. I apply it under my eyes, on my nose, my chin and forehead.
Step six
I use a powder to set all of this, I always use a puff to do this and never a brush because a puff sets the powder in whilst a brush is made to brush off excess powder – learnt this from gossmakeupartist on YouTube and it makes the world of difference. If you have oily skin, give this a try and you’ll see how much longer your face stays matte for.

20130306-190152.jpg
Step seven
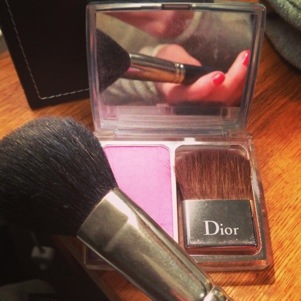
Finally, I add blush to the apples of my cheeks. I’m addicted to Dior’s new Rosy Glow blusher.

20130306-190253.jpg
Step eight
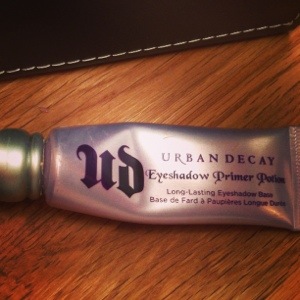
I always like to add an eyeshadow primer, it not only stops the shadow creasing but it also makes the colour go in more pigmented. I’m in love with Urban Decay’s primer potion.

20130306-190401.jpg

20130306-190410.jpg

20130306-190417.jpg
Step nine
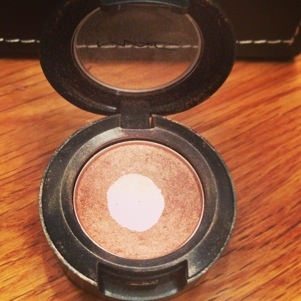
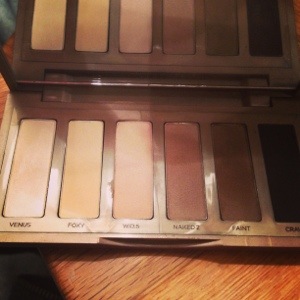
For my eyes I use MAC All That Glitters for the base, it’s one of my favourites. I used Naked 2 from my Urban Decay Palette for above my lids with Faint right in the sockets to add depth. Venus was then used to highlight under my brows. I used MAC Satin Taupe under my water line.

20130306-190741.jpg
Step ten
For my eyeliner, I always use Bobbi Brown Gel Liner, it’s the best I’ve found, glides on so smoothly and lasts till I take it off. I apply this with a Topshop liner brush.

20130306-190901.jpg
Step eleven
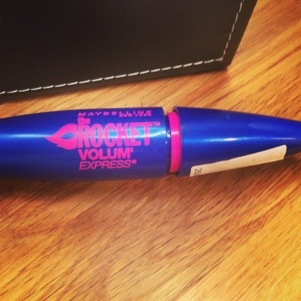
Finally, I apply two coats of my new Maybelline Rocket Volume mascara – my new found love.

You can then leave it as it is or add your favourite lipstick which I always do. Hope you’ve enjoyed 🙂

20130306-191044.jpg

20130306-191131.jpg

Easy, quick messy bun without the donut

20130208-104333.jpg
I discovered how to do this updo on holiday when I was just throwing my hair up for the pool as shown in the first photo, I was so happy and have done it regularly ever since. It takes me literally under a minute and stays in all day, it’s perfect for work or even styled properly for the evening. It’s not as neat as it would be if using a donut but I sometimes like that messy bun look. As you can see from the photos, you can have it a few different ways using the same technique.

All you need is a brush, a bobble and a few hair pins.
Step 1.
Brush your hair through and then go to tie all of your hair into a ponytail (if you want your bun in the middle then start your ponytail quite low, if you want it high then start it as high as you like). Rather than letting the ponytail all the way through on the last twist of the bobble, keep it half in and half out (rubbishy explained sorry) so it looks like this:

20130208-104845.jpg

Step 2.
Tighten the bun by pulling it up high on the top of your head or to the middle of your head if you want your bun in the middle, spread the hair so it’s in a circular bun so it looks like this:

20130208-105018.jpg

Step 3
You will have strands of hair falling out of the bun as shown in the photo above so this is where the clips come in. Get all the fall out bits and wrap them around to the back and then tuck them in and use the clips to clip all the hair under the bun, use as many clips as it takes to make your bun feel nice and tightened. It should then look like this:

20130208-105215.jpg

Finally, if you would like your bun larger, you can pull and tweak at it so it gets bigger or you can keep it as it is. Hope this makes a tiny bit of sense haha!
Here is my final look:

20130208-105337.jpg

From the back (sorry about the awful photo I took it myself, not easy!)

20130208-105506.jpg